
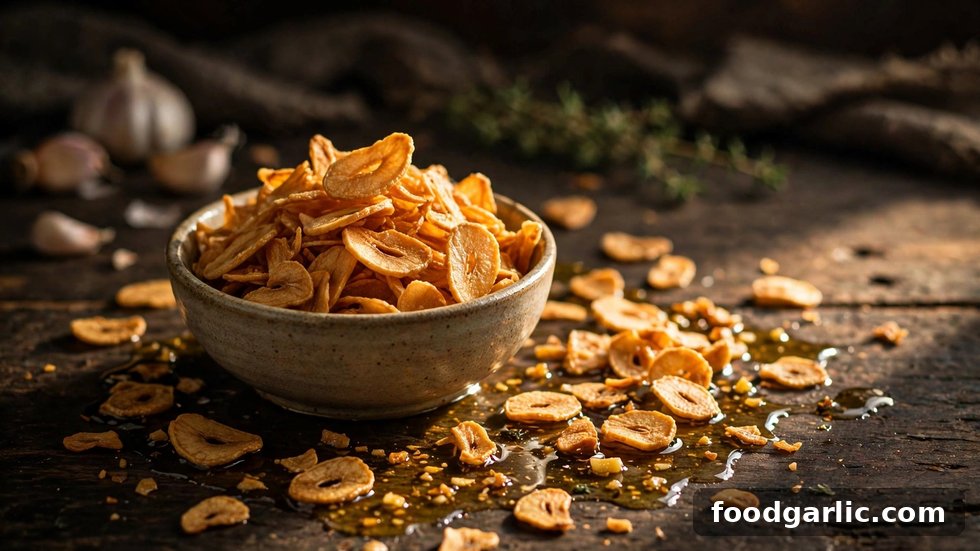
Those golden, crackling garlic chips on top of ramen, congee, or a steak are one of cooking’s simplest luxuries. Crispy fried garlic chips take five minutes, cost almost nothing, and add a nutty crunch that elevates everything from soups to salads to rice bowls.
This guide shows you how to slice garlic evenly, the exact oil temperature for perfect chips, how to avoid the bitter burnt stage, and creative ways to use both the chips and the flavored oil they leave behind.
Table of Contents
- Why Garlic Chips Are Worth Making
- Choosing and Slicing Garlic for Even Chips
- Step-by-Step: Frying Perfect Garlic Chips
- How to Avoid Burnt, Bitter Chips
- Storing Garlic Chips and Garlic Oil
- 10 Ways to Use Crispy Garlic Chips
- Frequently Asked Questions
Why Garlic Chips Are Worth Making
Frying transforms garlic completely. Raw garlic is sharp; roasted garlic is sweet and soft. Fried garlic chips land in between — toasty, nutty, and shatteringly crisp, with the harsh bite cooked away but deep garlic flavor intact.
They are also a two-for-one ingredient: the oil you fry them in becomes intensely garlic-flavored — liquid gold for stir-fries, dressings, and drizzling. And they solve a texture problem, adding crunch to soft dishes like congee, mashed potatoes, and silky soups.
Choosing and Slicing Garlic for Even Chips
Even slices are the whole secret — uneven slices mean half your batch burns while the other half stays soft.
- Use large, fresh cloves — plump cloves slice more evenly and are easier to handle. Avoid sprouted or soft garlic.
- Slice 1 to 2 mm thick — about the thickness of a coin. Thinner burns instantly; thicker stays chewy in the middle.
- Use a mandoline if you have one, with the hand guard on. Otherwise, a sharp knife and steady hand work fine.
- Keep slices uniform — sort out any paper-thin or extra-thick pieces and fry them separately.
- Pat slices dry with a paper towel. Surface moisture causes splattering and slows crisping.
Aim for about 1 head of garlic (10 to 12 cloves) per batch — roughly 1/3 cup of chips, enough to garnish several dishes through the week.
Step-by-Step: Frying Perfect Garlic Chips
The cold-oil start is the professional trick: it lets the garlic heat gently and evenly, so every chip crisps at the same rate.
- Step 1: Place sliced garlic in a small saucepan and add enough neutral oil (peanut, canola, or vegetable) to cover by about 1 cm.
- Step 2: Set over medium-low heat. The garlic should start to bubble gently within 2 to 3 minutes.
- Step 3: Stir occasionally so slices do not stick. They will go from white to pale gold over 4 to 6 minutes.
- Step 4: When chips turn light golden — lighter than you think — immediately strain them out. They keep cooking from residual heat and darken fast.
- Step 5: Spread on a paper-towel-lined plate and sprinkle with fine salt while hot.
- Step 6: Save the oil! Let it cool, strain it, and bottle it as garlic oil.
The golden rule: pull them early. Garlic chips go from pale gold to perfectly golden off the heat, but from golden to burnt in under 30 seconds if you wait. When in doubt, strain sooner.
How to Avoid Burnt, Bitter Chips
- Control the heat: Medium-low is the maximum. If the oil smokes or bubbles violently, lift the pan off the heat for 30 seconds.
- Watch the color, not the clock: Slice thickness and stove power change timing, so color is your only reliable guide — target pale champagne gold in the pan.
- Do not crowd the pan: Overcrowding drops the oil temperature and steams the slices. Fry in small batches.
- Burnt batch? Throw it out — bitterness will not fade. Start fresh; garlic is cheap.
Storing Garlic Chips and Garlic Oil
- Garlic chips: Cool completely, then store in an airtight jar at room temperature for up to 2 weeks — any trapped warmth creates condensation and kills the crunch. Do not refrigerate the chips; cold makes them go stale faster.
- Garlic oil: Strain through a fine mesh, bottle, and refrigerate; use within 1 month. Never store garlic oil at room temperature — low-acid oil is a botulism risk.
- Reviving soft chips: Spread on a tray and warm in a 150°C (300°F) oven for 5 minutes.
10 Ways to Use Crispy Garlic Chips
- Ramen and noodle soups — the classic; crunch against hot broth
- Congee and rice porridge — texture where there was none
- Steak and grilled meats — scatter over the resting meat
- Mashed potatoes — fold through for crunch in every bite
- Salads — a better crouton, essentially
- Avocado toast — with chili flakes and the garlic oil drizzled over
- Fried rice — stir through at the very end
- Hummus and dips — on top with a swirl of the garlic oil
- Roasted vegetables — especially broccoli and green beans
- Plain white rice — with a pinch of salt and a drizzle of the oil, deceptively good
Frequently Asked Questions
Why are my garlic chips bitter?
Bitterness means they overcooked. Garlic goes from golden to burnt in seconds, and carryover heat keeps cooking them after straining. Pull chips when they are pale gold — lighter than the final color you want — and they will finish perfectly on the towel.
Can I make garlic chips in an air fryer?
Yes. Toss slices lightly in oil and air-fry at 150°C (300°F) for 8 to 10 minutes, shaking halfway. They will not be quite as even as pan-fried, but they work. Watch them closely in the last 2 minutes.
How long do homemade garlic chips last?
About 2 weeks in an airtight container at room temperature, as long as they cooled completely before sealing. If they soften, 5 minutes in a low oven restores the crunch.
Is the leftover garlic oil safe to keep?
Yes, if refrigerated and used within a month. Strain out all solids, bottle the oil, and keep it cold. Never store garlic oil at room temperature — garlic in oil without acid creates conditions where botulism bacteria can grow.