
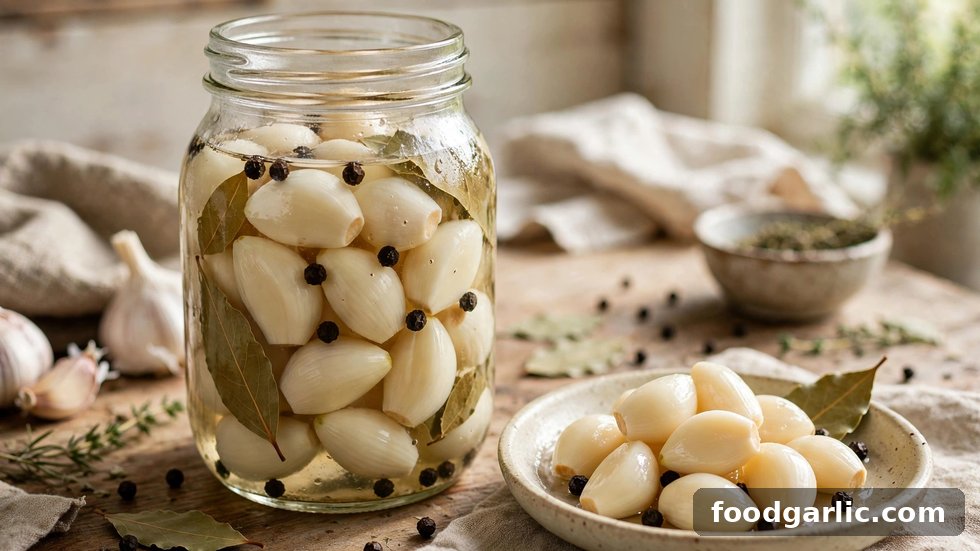
Pickled garlic is the snack you did not know you were missing: crunchy cloves with a sweet-sour punch, mellowed by the brine into something you can eat straight from the jar. Loved across Korea, the Middle East, and Eastern Europe, it is addictive, easy to make, and keeps for months.
This recipe covers the quick-pickle method (ready in 48 hours), the ingredients for perfect sweet-sour balance, the food safety rules you must follow, and creative ways to use your pickled garlic.
Table of Contents
- Why Pickled Garlic Is Worth Making
- Ingredients for Sweet-Sour Pickled Garlic
- Step-by-Step Pickled Garlic Recipe
- Flavor Variations to Try
- Food Safety: The Rules You Must Follow
- How to Use Pickled Garlic
- Frequently Asked Questions
Why Pickled Garlic Is Worth Making
Pickling transforms garlic’s personality. The vinegar brine tames the harsh raw bite while preserving crunch, and sugar rounds it into sweet-sour balance — closer to a pickled onion with extra depth than to raw garlic.
It is also practical: a jar in the fridge means instant flavor for salads, sandwiches, and cheese boards with no peeling or chopping. The quick-pickle method needs no canning equipment and is ready in two days — joining an old tradition, from Korean jangajji to Middle Eastern torshi seer.
Ingredients for Sweet-Sour Pickled Garlic
- 3 heads garlic (about 30–35 cloves), peeled — use firm, fresh cloves
- 1 cup white vinegar (5% acidity) or apple cider vinegar
- 1 cup water
- 3 tablespoons sugar — adjust to taste
- 1 tablespoon salt (non-iodized; pickling or kosher salt)
- 1 teaspoon black peppercorns
- 2 bay leaves
- 1 teaspoon mustard seeds (optional)
- 1 small dried chili (optional, for heat)
Makes about one 500 ml jar. Use non-iodized salt — iodine can darken the brine and add off flavors. Any vinegar at 5% acidity works; white gives the cleanest look, apple cider adds fruity depth.
Step-by-Step Pickled Garlic Recipe
- Step 1 — Peel: Separate and peel all cloves. The shake method works brilliantly: put cloves in a lidded jar and shake hard for 20 seconds — skins fly off.
- Step 2 — Blanch (optional but recommended): Drop cloves in boiling water for 60 seconds, then into ice water. This keeps them crunchy for months and reduces any harshness.
- Step 3 — Pack the jar: Place peppercorns, bay leaves, mustard seeds, and chili in a sterilized jar, then pack the garlic cloves in tightly.
- Step 4 — Make the brine: Bring vinegar, water, sugar, and salt to a rolling boil, stirring until sugar and salt dissolve completely.
- Step 5 — Pour and seal: Pour the hot brine over the garlic, leaving 1 cm headspace. Tap out air bubbles, seal the lid.
- Step 6 — Cool and refrigerate: Let cool to room temperature, then refrigerate. Wait at least 48 hours before tasting — one week is even better.
Storage: Keeps 3 to 4 months refrigerated. Always use a clean fork or spoon — never fingers — to fish cloves out, and keep them submerged in brine.
Flavor Variations to Try
- Korean-style: Replace half the vinegar with soy sauce and double the sugar for a deep, savory pickle.
- Spicy: Add fresh sliced chilies and a teaspoon of chili flakes.
- Herb garden: Tuck in fresh dill, thyme, or rosemary sprigs.
- Balsamic: Replace half the white vinegar with balsamic for a darker, richer pickle.
- Beet-pink: Add raw beetroot slices — the cloves turn gorgeous pink like Middle Eastern torshi.
- Honey garlic: Swap sugar for honey (add off the boil) for floral sweetness.
Once you have the basic method down, the brine is a canvas. Just keep the vinegar-to-water ratio and acidity the same for safety, and experiment freely with the seasonings.
Food Safety: The Rules You Must Follow
Garlic is a low-acid food, which means botulism bacteria can grow on it in oxygen-free environments. Pickling is safe because the vinegar makes the environment acidic — but only if you follow the rules:
- Always refrigerate. This is a refrigerator pickle, not a shelf-stable canned product. Room-temperature storage is unsafe.
- Use 5% acidity vinegar and do not dilute the brine beyond the recipe ratio.
- Sterilize your jars — 10 minutes in boiling water or a hot dishwasher cycle.
- Keep cloves submerged in brine at all times; exposed garlic can spoil.
- Discard if you see cloudiness beyond normal settling, fizzing, off smells, or any mold.
- If your garlic turns blue or green, do not panic — this is a harmless natural reaction between garlic’s sulfur compounds and the acid. It is safe to eat.
How to Use Pickled Garlic
- Straight from the jar — the honest best way; it is a proper snack
- Cheese and charcuterie boards — the acidity cuts through rich meats and cheeses
- Chopped into salads — instant punchy flavor without raw-garlic harshness
- In sandwiches and wraps — slice cloves thin for a tangy layer
- Mashed into dressings — whisk into vinaigrettes for depth
- On pizza — scatter over just before serving
- In bloody marys or martinis — a pickled clove beats an olive
- The brine itself — splash into salad dressings, marinades, or a dirty martini
Frequently Asked Questions
How long does pickled garlic last?
Refrigerator-pickled garlic lasts 3 to 4 months when kept cold, submerged in brine, and handled with clean utensils. Discard it if the brine turns cloudy, fizzes, smells off, or shows any mold.
Why did my pickled garlic turn blue or green?
This is a harmless natural reaction: garlic’s sulfur compounds react with acids to form blue-green pigments. It looks alarming but is completely safe to eat, and the color often fades over time.
Can I store pickled garlic at room temperature?
No — not with the quick-pickle method. Safe room-temperature storage requires proper water-bath canning with tested recipes. Refrigerator pickles must stay refrigerated because garlic is a low-acid food with botulism risk otherwise.
Do I need to peel the garlic before pickling?
Yes, for this recipe. The brine needs direct contact with the cloves to flavor and preserve them. Unpeeled cloves pickle unevenly and the papery skins turn unpleasant in the jar. Use the shake-in-a-jar method to peel quickly.
2 thoughts on “Pickled Garlic Recipe: Sweet, Sour, and Crunchy Snack”