
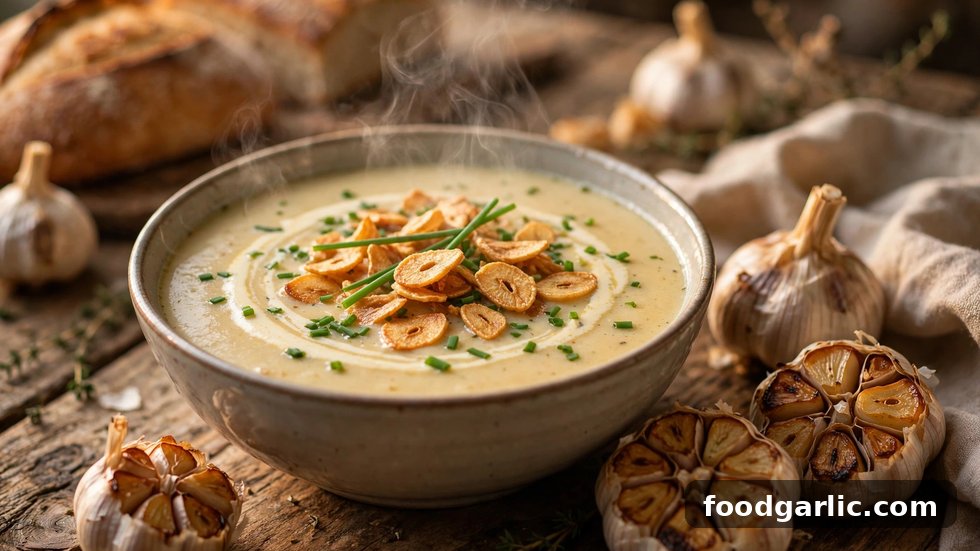
There is a soup that converts garlic skeptics: silky, creamy, deeply savory — with not a hint of harshness. Roasting transforms garlic’s sharp bite into something sweet, nutty, and luxurious. This is that soup.
In this guide, you will learn how to make creamy roasted garlic soup from scratch, including how to roast garlic to sweet perfection, the step-by-step soup method, pro tips for the silkiest texture, and delicious variations. One pot, about an hour, unforgettable results.
Table of Contents
- Ingredients You Will Need
- Step 1: Roasting the Garlic to Sweet Perfection
- Step 2: Making the Soup
- Pro Tips for the Silkiest Texture
- Delicious Variations to Try
- Serving Suggestions and Storage
- Frequently Asked Questions
Ingredients You Will Need
Serves 4 as a starter or 2–3 as a main. Do not be alarmed by the garlic quantity — roasting mellows it completely.
- 4 whole heads of garlic (yes, four — trust the process)
- 2 tablespoons olive oil, plus more for roasting
- 1 large onion, diced
- 2 medium potatoes (about 300 g), peeled and cubed — the secret to creaminess without heavy cream
- 4 cups (1 liter) vegetable or chicken stock
- 1/2 cup (120 ml) heavy cream (or coconut cream for dairy-free)
- 1 teaspoon fresh thyme leaves (or 1/2 teaspoon dried)
- Salt and freshly ground black pepper to taste
- Optional garnish: crispy garlic chips, chives, a swirl of cream, good bread
Step 1: Roasting the Garlic to Sweet Perfection
- Preheat the oven to 200°C (400°F).
- Prep the heads: slice off the top 1 cm of each garlic head to expose the cloves. Drizzle generously with olive oil and sprinkle with salt.
- Wrap each head loosely in foil and place on a baking tray.
- Roast for 35–45 minutes, until the cloves are deeply golden and completely soft — they should squeeze out like paste.
- Cool slightly, then squeeze the soft cloves out of their skins into a bowl. Discard the papery skins.
Perfectly roasted garlic smells sweet and nutty, never acrid. If your garlic tastes bitter, it roasted too hot or too long — lower the heat next time.
Step 2: Making the Soup
- Step 1 — Soften the aromatics: heat 2 tablespoons olive oil in a large pot over medium heat. Sauté the diced onion with a pinch of salt for 6–8 minutes until soft and translucent.
- Step 2 — Add potatoes and thyme: stir in the cubed potatoes and thyme; cook 2 minutes more.
- Step 3 — Add stock and roasted garlic: pour in the stock and add all the roasted garlic cloves. Bring to a boil, then reduce to a gentle simmer for 20 minutes, until the potatoes are completely tender.
- Step 4 — Blend until silky: blend with an immersion blender (or in batches in a countertop blender) until completely smooth.
- Step 5 — Finish with cream: stir in the heavy cream, season generously with salt and pepper, and warm through gently — do not boil after adding cream.
- Step 6 — Serve: ladle into warm bowls and garnish as you like.
Pro Tips for the Silkiest Texture
- Blend longer than you think: give it a full 2–3 minutes of blending — silkiness comes from thorough emulsification.
- Strain for restaurant smoothness: pass the blended soup through a fine-mesh sieve for a truly velvety finish.
- Potatoes over flour: potatoes thicken naturally and blend smoother than any roux-based thickener.
- Adjust thickness: too thick? Thin with warm stock. Too thin? Simmer uncovered for 10 minutes to reduce.
- Season in layers: salt the onions, salt the simmer, then final-season at the end — layered seasoning tastes richer.
Delicious Variations to Try
- Roasted garlic and cauliflower: swap half the potatoes for cauliflower florets for a lighter soup.
- Spicy version: add 1/2 teaspoon smoked paprika and a pinch of chili flakes with the thyme.
- Herb-forward: blend in a handful of fresh basil or parsley at the end for a green, fresh twist.
- Vegan: use vegetable stock and coconut cream — the coconut flavor disappears behind the roasted garlic.
- Cheesy: stir in 1/2 cup grated parmesan with the cream for extra savory depth.
- With crispy toppings: thin-sliced garlic fried golden in olive oil makes an irresistible crunchy garnish.
Serving Suggestions and Storage
- Serve with: crusty sourdough for dunking, a simple green salad, or grilled cheese sandwiches for the ultimate comfort pairing.
- Refrigerate: keeps 4–5 days in an airtight container; the flavor deepens overnight.
- Freeze: freeze without the cream for up to 3 months; add cream when reheating for the best texture.
- Reheat gently: warm over low heat, stirring — never boil, or the cream may split.
Frequently Asked Questions
Will 4 heads of garlic make the soup too strong?
No — roasting transforms garlic completely. The harsh raw bite becomes sweet, nutty, and mellow. Four heads sounds like a lot, but the finished soup tastes rich and gentle, not aggressive.
Can I make this soup without cream?
Yes. The potatoes already make it creamy — just skip the cream or replace it with coconut cream or cashew cream. Blend thoroughly and you will barely miss it.
Can I use pre-peeled or jarred garlic instead?
Whole heads roast best — pre-peeled cloves dry out and jarred garlic has an acidic tang. If you must substitute, use peeled cloves tossed in oil in a covered baking dish, but whole heads give superior results.
Why is my roasted garlic bitter?
Bitterness means it roasted too hot or too long. Keep the oven at 200°C (400°F) maximum, wrap the heads in foil to protect them, and pull them when golden — not dark brown.
A bowl of creamy roasted garlic soup is proof that simple ingredients, treated well, can taste extraordinary. Roast your garlic low and slow, blend it silky smooth, and finish with your favorite toppings. Make a double batch — it stores beautifully and tastes even better the next day.
1 thought on “How to Make Creamy Roasted Garlic Soup from Scratch”