
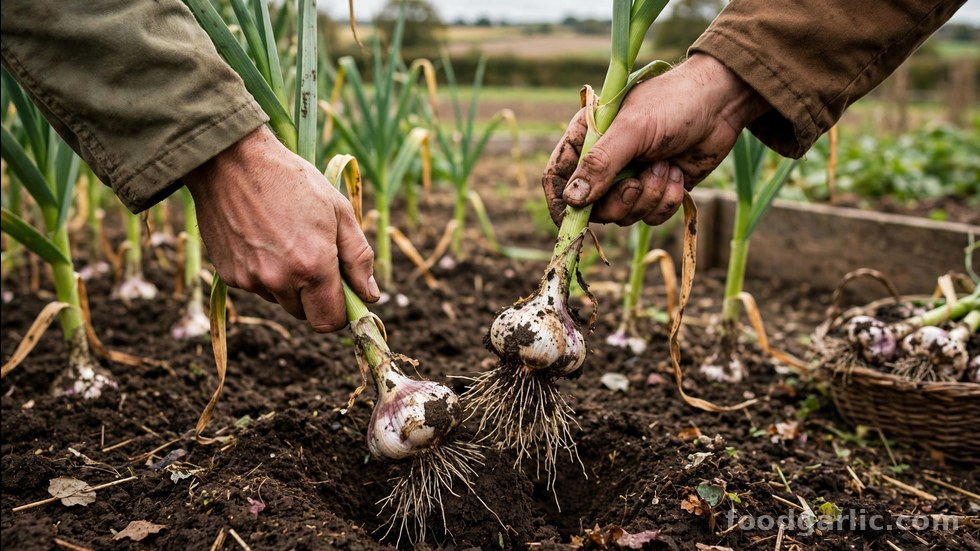
You planted garlic last fall, watched it survive winter, and now the tops are yellowing. Harvest too early and you get small, poorly formed bulbs; harvest too late and the cloves burst through their wrappers, inviting disease and ruining storage life. The harvest window is only about a week long, so knowing exactly what to look for matters. Here is how to time your garlic harvest perfectly.
Table of Contents
- The Leaf Die-Back Rule
- Dig a Test Bulb First
- Regional Harvest Timing
- How to Dig Without Damage
- Curing Your Garlic
- Too Early vs Too Late
- After Curing: Storage
- FAQs
The Leaf Die-Back Rule
The classic rule: harvest when the bottom 3 to 4 leaves have turned brown, but 5 to 6 green leaves remain. Garlic leaves correspond to wrapper layers — each green leaf equals one protective wrapper around the bulb. Wait until all leaves are brown and those wrappers break down underground.
Watch the lower leaves, not the top. The bottom leaves die first as the plant redirects energy to the bulb. When the lowest leaves crisp and brown while the top half is still green, the bulbs are nearly ready — usually within 7 to 10 days.
- Count from the bottom: 3–4 brown, 5–6 green = go.
- Hot, dry weather accelerates die-back; cool, wet weather slows it.
- Do not water in the last 2–3 weeks — dry soil at harvest reduces rot and eases curing.
Dig a Test Bulb First
Leaves tell you timing; a test dig tells you the truth. When the leaf rule says harvest is near, carefully dig one or two bulbs and inspect them.
What a ready bulb looks like:
- Plump cloves with visible division — press gently and feel the distinct bumps.
- Tight, intact wrappers with 3–4 layers; they should not be torn or splitting.
- Bulb size feels right — comparable to what you planted, ideally larger.
If cloves are flat and underdeveloped, rebury the test bulb and wait 5–7 days. If wrappers are already splitting and cloves are separating, harvest everything immediately — you are at the late edge of the window.
Regional Harvest Timing
Garlic harvest typically falls in mid-summer, but timing shifts by climate:
- Warm climates (zones 8–10): late May to early June.
- Moderate climates (zones 6–7): mid-June to mid-July.
- Cold climates (zones 3–5): late July to early August.
Softneck garlic often matures 1–2 weeks earlier than hardneck in the same bed. Mark your planting map so you harvest each type at its own peak. Spring-planted garlic runs 2–3 weeks later than fall-planted in the same zone.
How to Dig Without Damage
Never pull garlic by the stalk — bruised and nicked bulbs rot in storage. Digging takes a few extra minutes per plant and is the difference between garlic that keeps for months and garlic that spoils.
- Use a garden fork, not a shovel — forks slice less.
- Insert the fork 4–6 inches from the plant and loosen the soil all the way around.
- Lift from below, then gently shake off loose dirt — do not wash or rinse.
- Harvest on a dry day if possible; morning is fine, full sun is fine for brief periods.
- Handle bulbs gently from the moment they leave the ground.
Cut stems show how far along things are — if you are unsure about scape timing, remember that scapes are removed weeks before harvest and do not signal bulb readiness.
Curing Your Garlic
Freshly dug garlic is wet and must be cured for 2–4 weeks before storage or eating for best flavor. Curing dries the necks and outer wrappers, sealing the bulb against moisture and disease.
- Lay or hang bulbs in a shady, dry, well-ventilated spot — a barn, garage, or covered porch.
- Keep them out of direct sunlight, which can sunburn and discolor wrappers.
- Do not trim roots or tops until curing is complete; leaves feed the bulb as they dry.
- Good airflow is essential — space bulbs so air circulates around every one.
Garlic is cured when the neck is completely dry and papery, the roots are brittle, and the outer wrappers rustle. Then trim roots to half an inch and cut stalks to 1–2 inches (or braid softnecks).
Too Early vs Too Late
Harvesting too early: bulbs are small, cloves are underdeveloped, and wrappers are too thin for good storage. Early-harvested garlic tastes mild and grassy rather than rich and pungent. It keeps poorly — use it fresh within a few weeks.
Harvesting too late: wrappers split underground, cloves separate, and the bulb loses its protective skin. Late-harvested garlic is highly vulnerable to mold and rot and stores badly. If you missed the window, prioritize those bulbs for immediate cooking and preserve the rest by freezing or dehydrating.
When in doubt, harvest slightly early rather than late — early bulbs still cure and store acceptably, while late bulbs degrade fast. Our guide to telling if garlic has gone bad helps you spot damage before it spreads.
After Curing: Storage
Once cured, garlic stores best at room temperature (60–65°F) with good airflow. Mesh bags, open baskets, or braided strands hung in a cool kitchen all work. Never store cured garlic in the refrigerator — cold triggers sprouting.
- Hardneck: use within 4–6 months.
- Softneck: keeps 8–12 months.
Full details are in our guide to storing garlic for months. And if green shoots appear in storage, do not panic — read up on sprouted garlic before tossing it.
Frequently Asked Questions
Can I harvest garlic after rain?
It is better to wait 2–3 days after heavy rain so the soil dries. Digging in wet soil damages bulbs and slows curing, increasing rot risk. If rain is forecast for weeks, harvest anyway and cure with extra ventilation.
What if my garlic did not form cloves?
A single undivided “round” usually means the variety did not get enough cold (vernalization) or was planted too late in spring. Replant rounds in fall — they often form full bulbs the second year.
Should I wash garlic after digging?
No. Washing adds moisture that invites mold during curing. Shake or brush off loose soil and let the rest dry — it falls away naturally.
Can I eat garlic right after harvest without curing?
Yes — “green” or fresh garlic is delicious, milder and juicier than cured. Curing is only required for storage, not for eating. Enjoy a few bulbs fresh while the rest cures.
How do I know curing is finished?
The neck should be completely dry and stiff, roots brittle, and outer wrappers papery and rustling. Cut a test bulb: if the neck feels moist or flexible inside, give it another week.